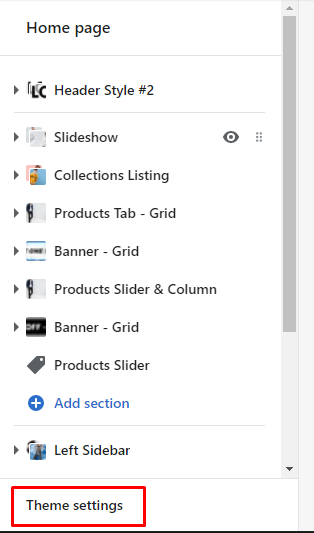
Theme settings
The Theme settings is where you’ll be able to make global changes to your store or sections, including text and background color changes, typography selection, and more. All settings will appear in the Right sidebar after you click to Theme settings text at the bottom of Left Sidebar.
All options group listing:
Colors Setting
The group include a lot of Color options use to change the color style of the theme. Each color option have the description which area it will change to. Color option support color picker will easily to pick the idea color.
-
Global Colors
-
Mobile Page Colors
-
Desktop Page Colors
-
Mobile Header
-
Desktop Header
-
Desktop Breadcrumb
-
Mobile Footer
-
Desktop Footer

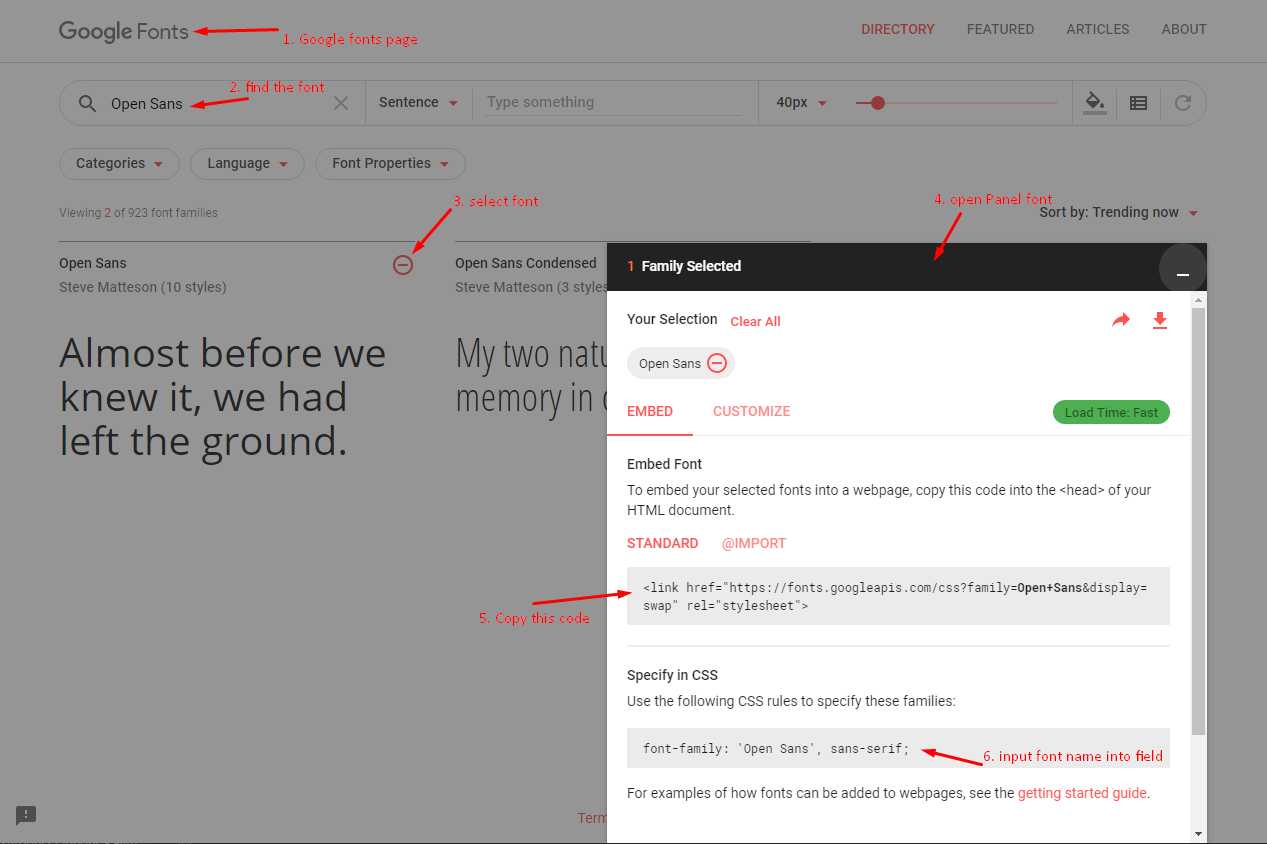
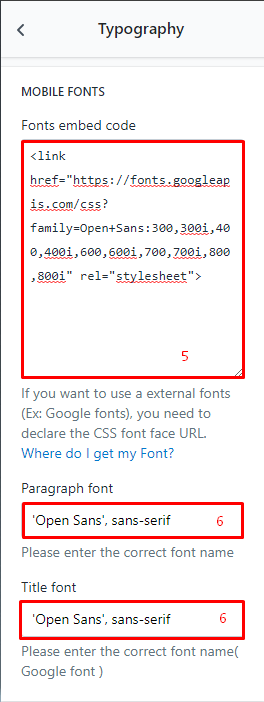
Typography
The theme support all Google Fonts. There are 2 group settings: MOBILE FONTS and DESKTOP FONTS, each group will be option to:
-
Fonts embed code: here is area to import Google fonts into the site. You need go to Google Fonts then select the font and copy link embed.
-
Paragraph font: input the font name for Paragraph.
-
Title font: input the font name for Title.
General Settings
-
Page Direction (Beta)
Is the Select box option, with 2 options:
Left to RightorRight to Left. Depend on option will make the layout showing style. -
Default sharing image
Is the Image option. When you share the site, it will get the image that you upload as main image in timeline.
-
Active Sticky Header Menu
The Header Menu is sticked at the top of page when you scroll over it
-
Active Button to Top
Is the Checkbox option. Active or Deactive the
Scroll to topbutton that appear in the bottom/right of the page, helps scroll the page to top of the site. -
Search articles
Is the Checkbox option. Active or Deactive will include search result include article or not.
-
Notification
-
Cart Notification: Is the Checkbox option. Notify when add a product to cart.
-
Compare Notification: Is the Checkbox option. Notify when add a product to compare.
-
Wish list Notification: Is the Checkbox option. Notify when add a product to wist list.
-
-
Dimension
The option to change the Logo size.
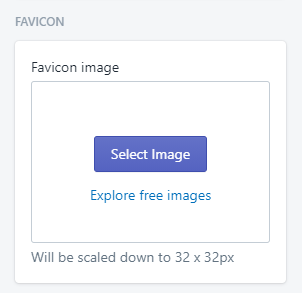
Favicon
It located in the General Settings area. Due to important, so we moved it out as the heading.
Upload the image for Favicon
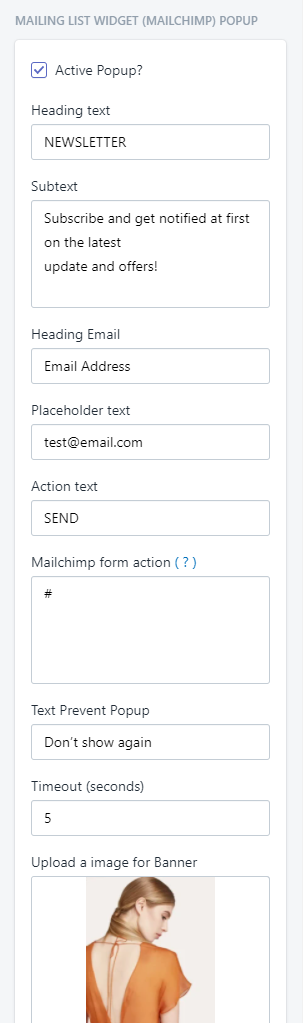
Mailing List Widget (Mailchimp) Popup
It located in the General Settings area. Due to important, so we moved it out as the heading.
Group options to control the Newsletter popup in Home page.
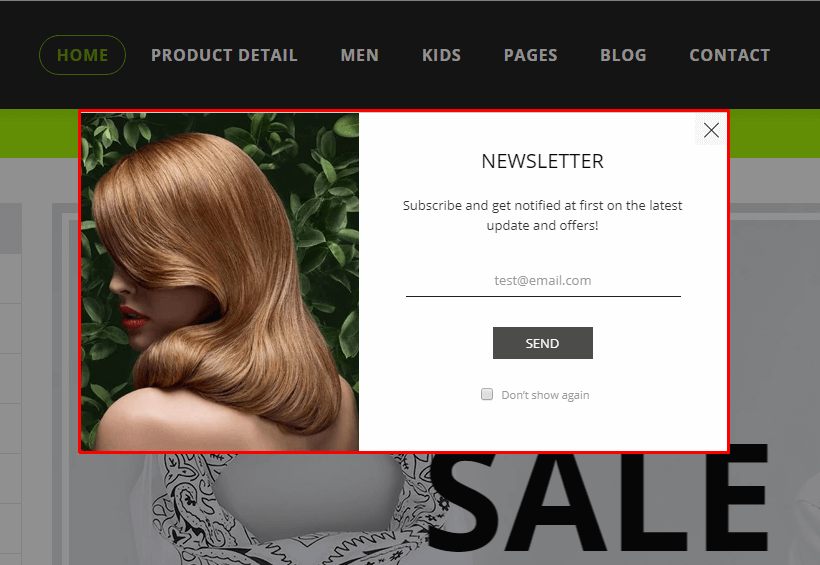
It will show in Home page front-end like
Follow the guide here to know how to get the Mailchimp Action Form url.
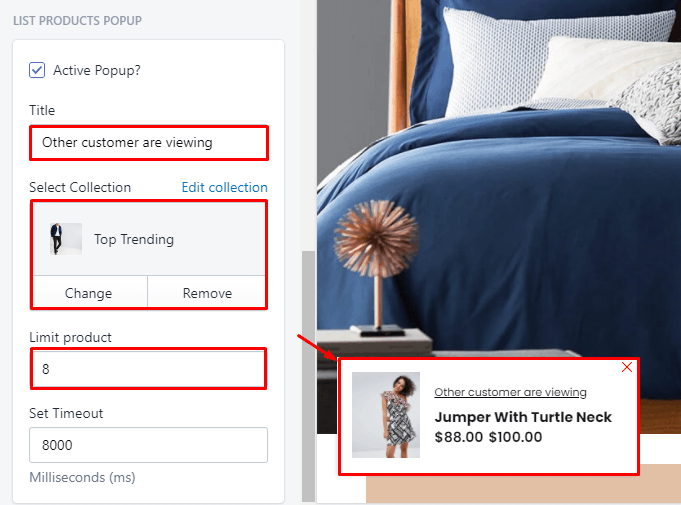
Suggestion/List Products popup
It located in the General Settings area. Due to important, so we moved it out as the heading.
Group options to control the products popup in the bottom/left.
You need set Active, set Title, Select Collection to show products, limit show and timer display.
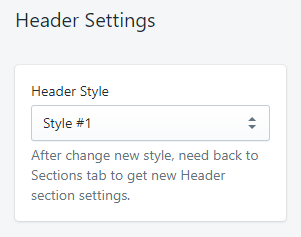
Header settings
Header Layout
Here is the listing of 9 Header layout. You can select one Header layout that suitable with your idea.
After change new style, need back to Sections tab to get new Header section settings.
We will guide how to use each header layout in the Heade/Footer section.
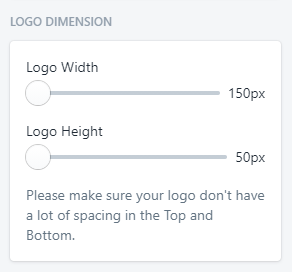
Logo Dimension
Options to increase/descrease the Logo size.
If it still not fine with your logo, please submit the converstation to request support change.
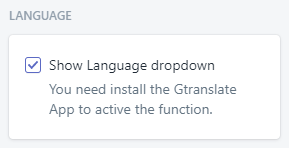
Language
Options to Show/Hide Language dropdown (from Shopify Gtranslate App)
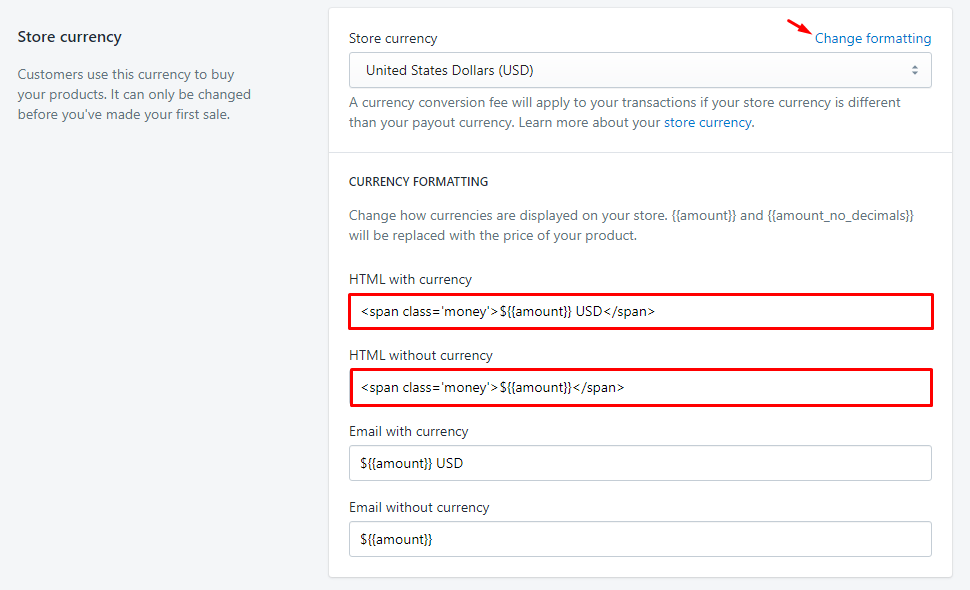
Currency
Although you will be able to display prices on your store front in different currencies, But Shopify will still process orders in your shop's currency.
To make the function work, need follow these steps:
Step 1: Input Currency Syntax:
-
From your Shopify admin, go to
Settings -
Click to
Generalarea. -
Scroll to
Store currencyarea at the bottom of the General Page. -
Click to
Change formattinglink -
Change the
HTML with currencyfieldfrom
${{amount}} USDto
<span class='money'>${{amount}} USD</span> -
Change the
HTML without currencyfieldfrom
${{amount}}to
<span class='money'>${{amount}}</span>
Step2 : Setup the Setting for Currency:
-
From your Shopify admin, go to
Online Store>Themes>Customize>Theme settings>Currency -
Input the currency code that want show in the site into
Currency you wish to supportfield.
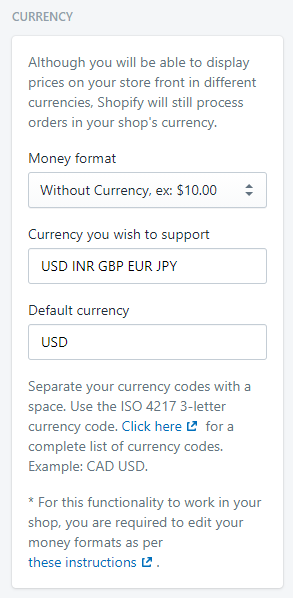
Note:
-
Shopify will still process orders in your shop's currency.
-
The code don't work with the mode
no decimals -
It can conflict with some Currency Apps. If you want use the Currency App, need contact us to remove this integrated feature.
Home page settings
1. Home page layout
There are 2 layout for choose: Default layout (Box/Full) or Sidebar (Box with sidebar in left).
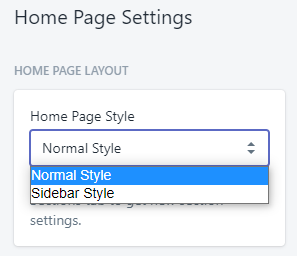
After change new style, need back to Sections tab to get new section settings.
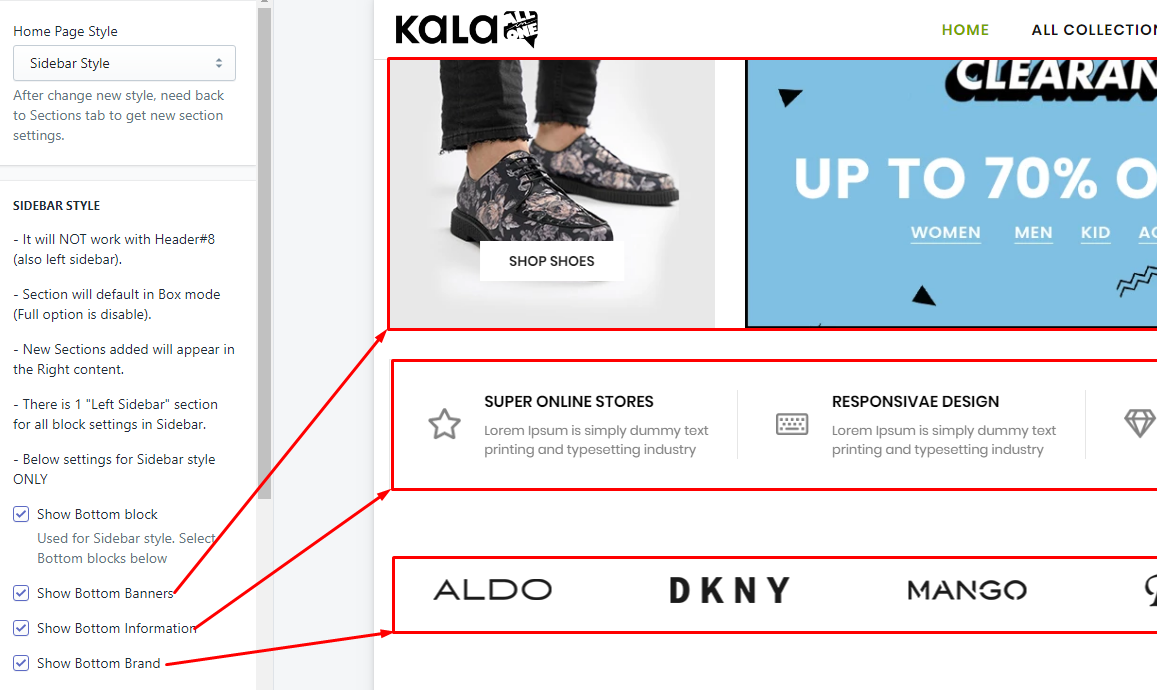
2. SIDEBAR STYLE
Listing settings for Sidebar layout.
-
It will NOT work with Header#8 (also left sidebar).
-
Section will default in Box mode (Full option is disable).
-
New Sections added will appear in the Right content.
-
The
Full widthoption will not work. -
There is 1 "Left Sidebar" section for all block settings in Sidebar.
There are 3 sections used in bottom of Home page when you use the Sidebar layout (check style demo)
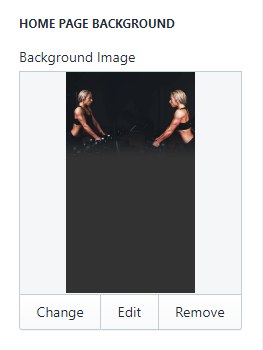
3. Background
Option to show the background of the Home page.
4. Special sections
Check to active the special sections.
-
Show Top Slideshow. It will NOT work with Header #8. Check style demo.
-
Show Slideshow in top of Sidebar layout. It will NOT work with Header #8. Check style demo.
Footer settings
Here is the listing of 5 Footer layout. You can select one Footer layout that suitable with your idea.
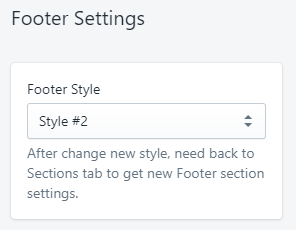
After change new style, need back to Sections tab to get new Footer section settings.
We will guide how to use each header layout in the Heade/Footer section.
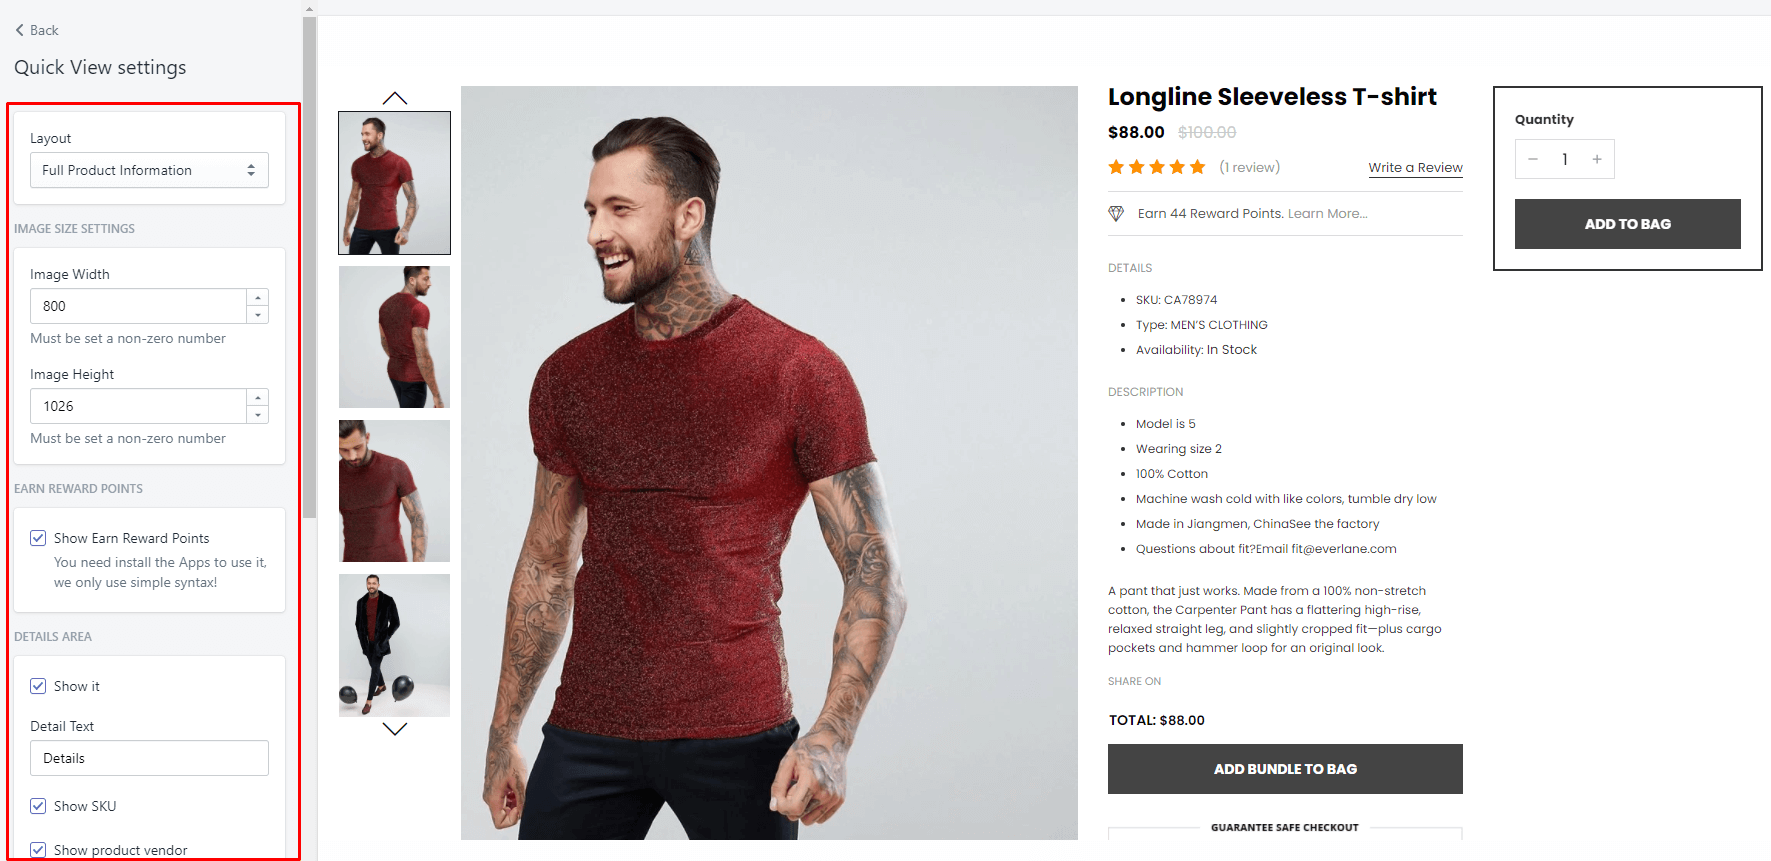
Quickview settings
All options to control the Quickview popup:
-
Layout: there are 2 layout: Full and Simple layout.
-
Image size settings.
-
Earn Reward Points (sample data).
-
Detail area: include SKU, Vendor, Type, Stock status, Description,...
-
Other information: such as image payment and social icons.
Product Options - Filters
There are 3 field to control the Product options
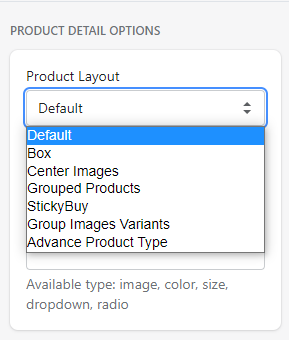
Product Layout
Select the layout for Product Detail page (as default for all products). Kala AllinOne include different 7 Product Detail layout
Options Mapping
Option is the setting for the type of product option in Detail page.
There are 5 type:
- Image
- Color
- Size
- Dropdown
- Radio
Syntax is: product_option_name : type | other_product_option_name : type
Example:
-
your product option is
Colorand you want set it display variant ascolor box, you need inputColor:color -
your product option is
Colorand you want set it display variant asimage, you need inputColor:image
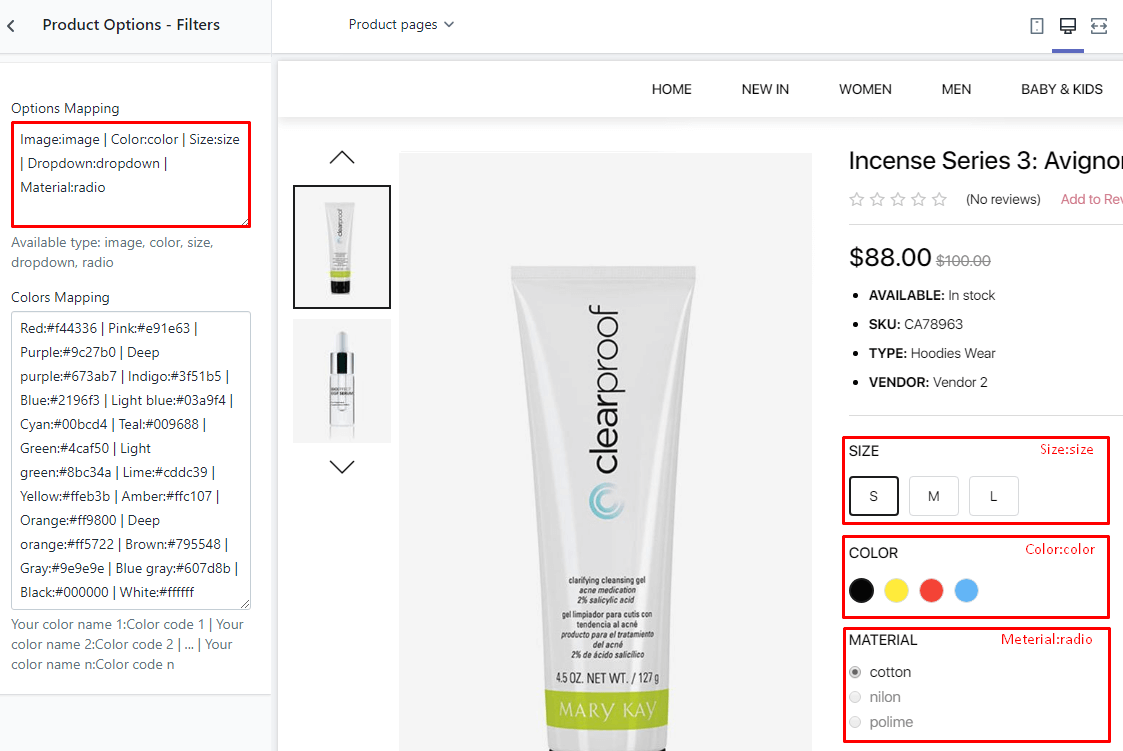
Colors Mapping
Option is the setting for the custom color (hex color) of variant in Filter (Collection Page)).
Syntax is: color_name : color_hex_code | color_name : color_hex_code
Example: you have custom color called Teal and want set the hex color #009688 for it. You need input Teal:#009688

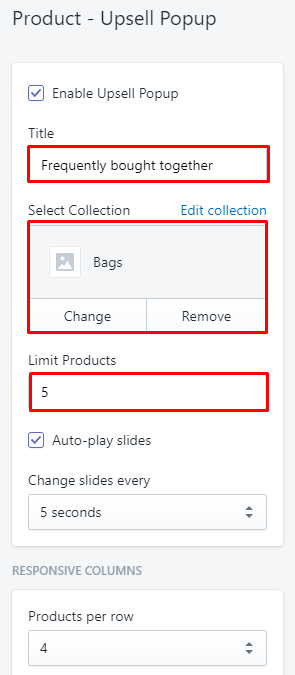
Product - Upsell Popup
When you click the Add to cart button, it will show the Popup with Suggestion Products in slider.
In the Customize > Theme settings > Product - Upsell Popup, You can change the Title and select collection to show products in popup, Slider and Responsive setting.
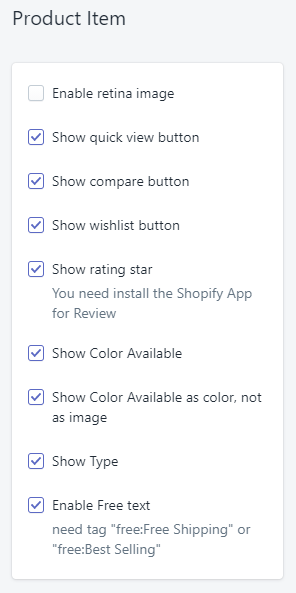
Product Item
All options to control the Product layout display in Home Pages, Collection Pages, Search result page,...
General settings
-
Image background
-
Image Width and Image Height: show the size of image display. Must be set a non-zero number
-
Enable retina image
-
Show description and Maximum character length of description: use to show short description with limit text and without HTML.
-
Show quick view button
-
Show compare button
-
Show wishlist button
-
Show rating: also need install the Shopify Apps to show it.
-
Show option and Show Color Available as color, not as image: use to show option when you hover it.
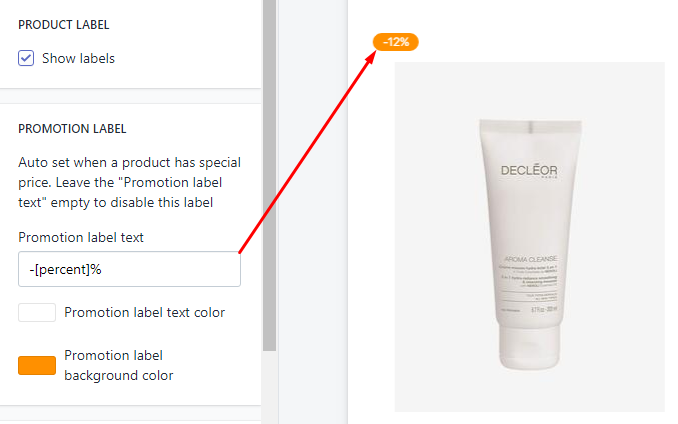
Product label
Option Show labels to enable/disable the label.
Below is 3 labels appear in product.
Promotion label
Auto set when a product has special price. Leave the "Promotion label text" empty to disable this label. You can set the color of text and background.
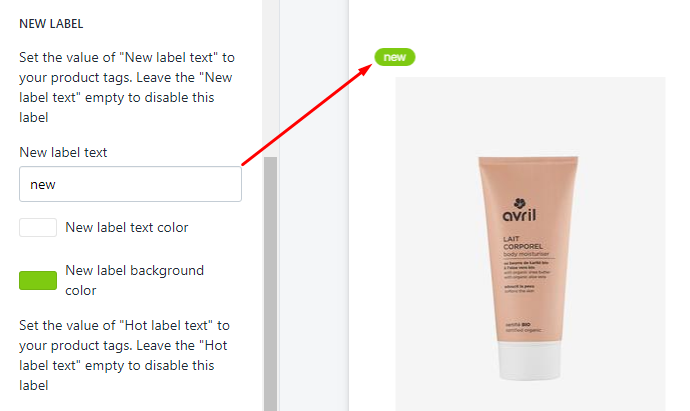
New label
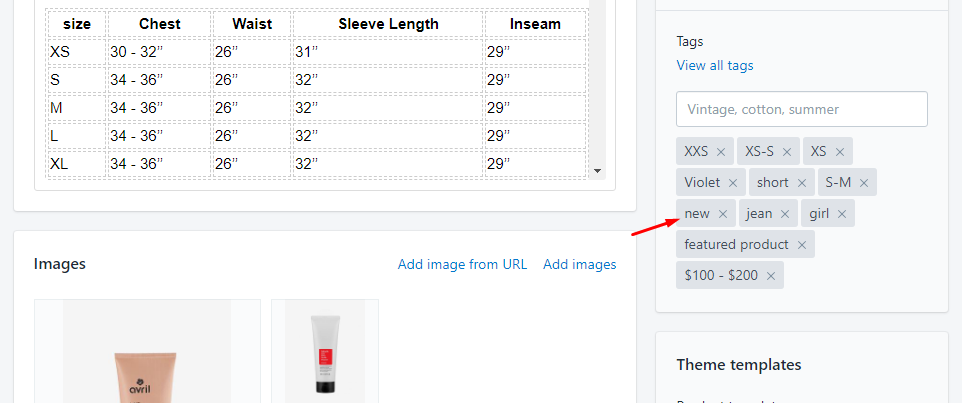
Set the value of "New label text" to your product tags. Leave the "New label text" empty to disable this label. You can set the color of text and background.
You also need tag the tag new into product that want show this label.
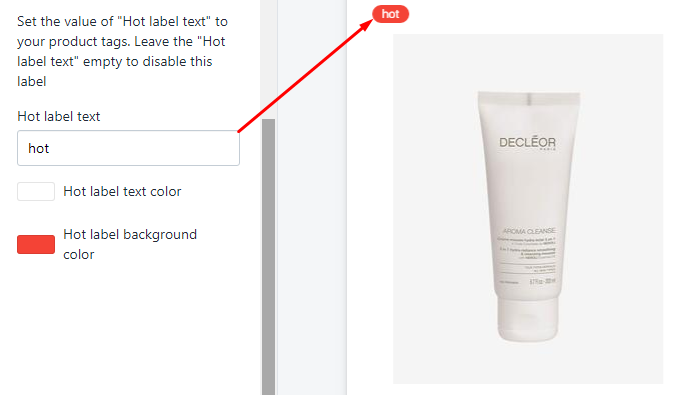
Hot label
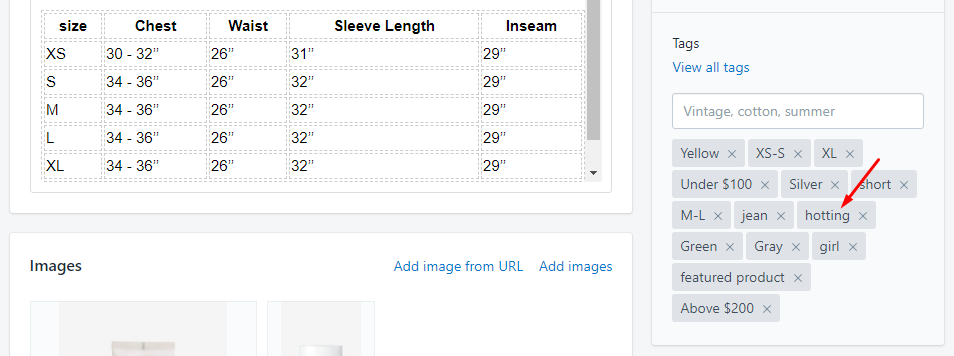
Set the value of "Hot label text" to your product tags. Leave the "Hot label text" empty to disable this label. You can set the color of text and background.
You also need tag the tag hotting into product that want show this label.
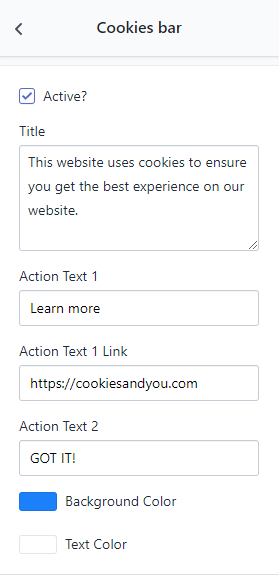
Cookies bar

This settings use to show The bottom bar as notify that the website use cookies to save site information into customer web browser.
Social media
This settings use to show social icons in some area have social area. Example in Footer or Mobile menu.
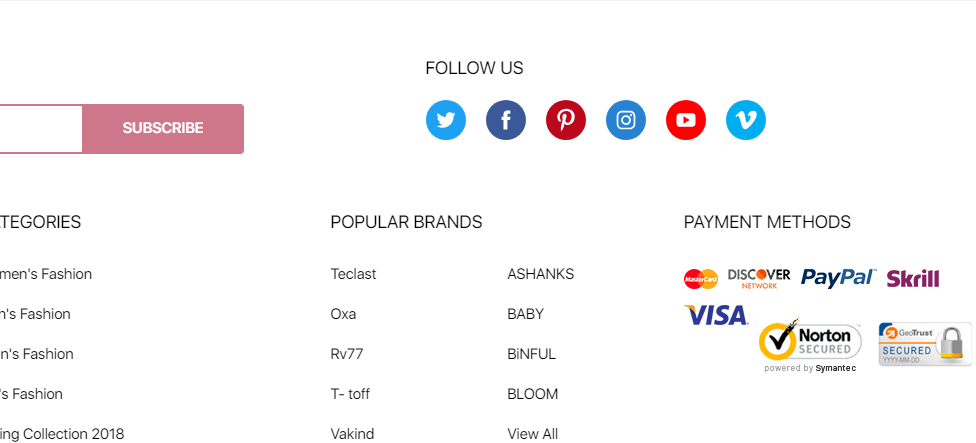
There are 2 groups: Social accounts and Your custom social media
Social accounts: Input the social url into these option fields:
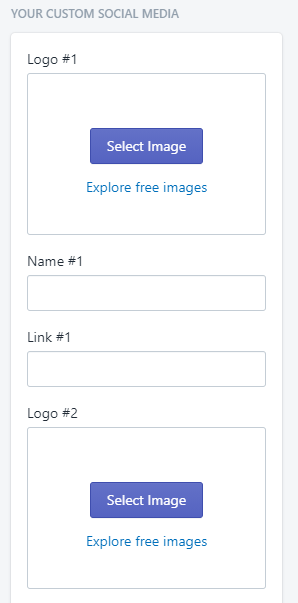
Your custom social media: Use it when above social icons don't suitable with your network. You need upload the social image, name and link.
Social media sharing
This settings use to show social share icons in Product Detail and Article (Post) page.
Currently only have 3 options can using share function: Share Facebook, Share Twitter, Share Pinterest
Checkout
This settings use to Customize the Checkout page. This option automatically render by Shopify. Because the Checkout page was controlled by Shopify. They only allow the field to custom the page such as upload Logo, change font, color,... these fields can not change.
